DEKOZELL®
Application of the DEKOZELL acoustic plaster system “FLEXOPANEL” with jointless final coating
Status 06/2022
Please adhere strictly to the instructions described on the following pages during application – otherwise errors are virtually inevitable.
The application of the acoustic plaster system is basically quite simple and one of our most frequently used structures. The potential for errors is often hidden in the details!
Error
Result
Substrate not Q2
No full-surface adhesion of the Flexopanel to the substrate, therefore risk of detachment.
Not primed with DEKOZELL Isogrund
No clearly defined absorbency and adhesion of the substrate, therefore risk of detachment.
Adhesive bed thinner than 600g/m².
-The most important error!-
No full-surface adhesion of the Flexopanel due to strong suction behavior of the panel, therefore risk of detachment.
Not bonded with DEKOZELL dispersion adhesive.
Risk of detachment during drying of the topcoat due to insufficient water resistance of the adhesive bond.
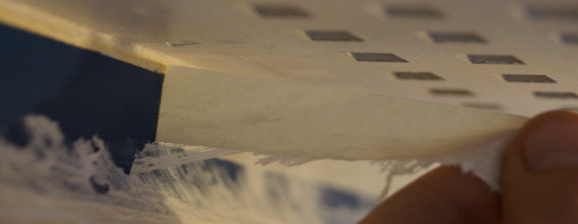
Flexopanels not rolled with wallpapering roller after application.
No full-surface adhesion of the Flexopanel, therefore risk of detachment.
Adhesive dried before laying the next sheet.
Danger of marks being left behind – the final coat of acoustic plaster only compensates slightly.
Flexopanel not glued in offset or not laid close together.
Risk of cracks forming in the jointless final coat of DEKOZELL® acoustic plaster.
Flexopanel not subsequently reinforced with dispersion adhesive in the 2 cm edge area to the wall.
Risk of hairline cracks at the end of the acoustic plaster in the edge area at the transition from ceiling to wall.
First layer of acoustic plaster applied immediately to wet fabric.
Unnecessarily “wasted” filler, which now lies behind the fabric rather than being available for sanding in front of it.
DEKOZELL applied too thinly as a final coat of acoustic plaster.
With a sanded surface as the desired end product, too little material thickness available for sanding, with a textured surface as the end product, risk of marking of the reinforcing mesh by the acoustic plaster
Step
Photo
Description
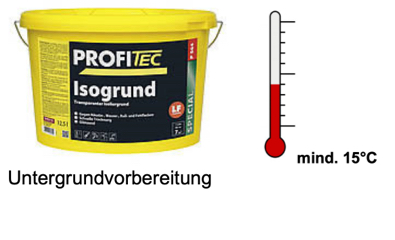
Pre-fill the substrate to surface quality Q2 and prime with DEKOZELL Isogrund (Profitec P564).
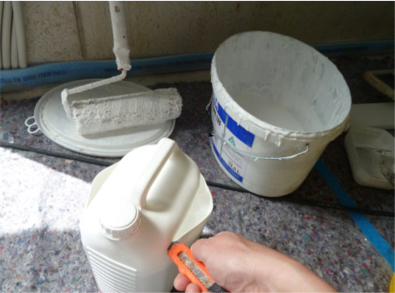
The substrate must be free of thermal bridges and at least as warm as the ambient air to avoid condensation.
Store Flexopanels in the construction site room for conditioning 1-2 days before starting work– similar to laminate, parquet or design flooring.
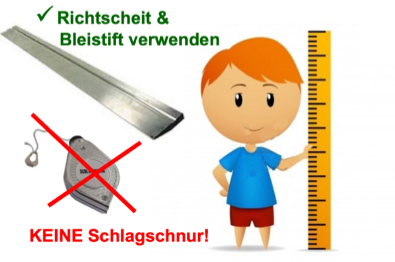
Draw a stop line in the middle of the surface in a similar way to laying tiles. DO NOT use a chalk line for this, as the colored chalk will migrate through to the final coating! Tip: Plastic adhesive tape on the center line saves the plastering effort for the adhesive overhang.
Note the width of the Flexopanel of 62.5 cm when selecting the position for the stop line – so that there is a sensible width for the last strip.
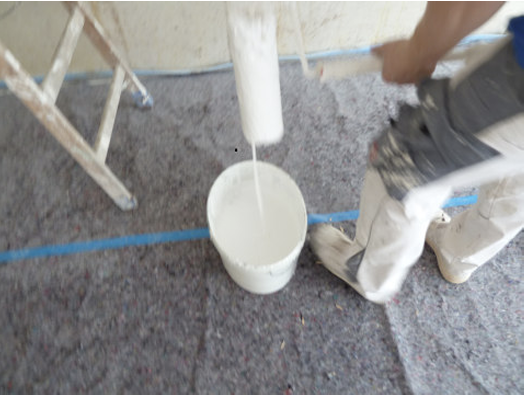
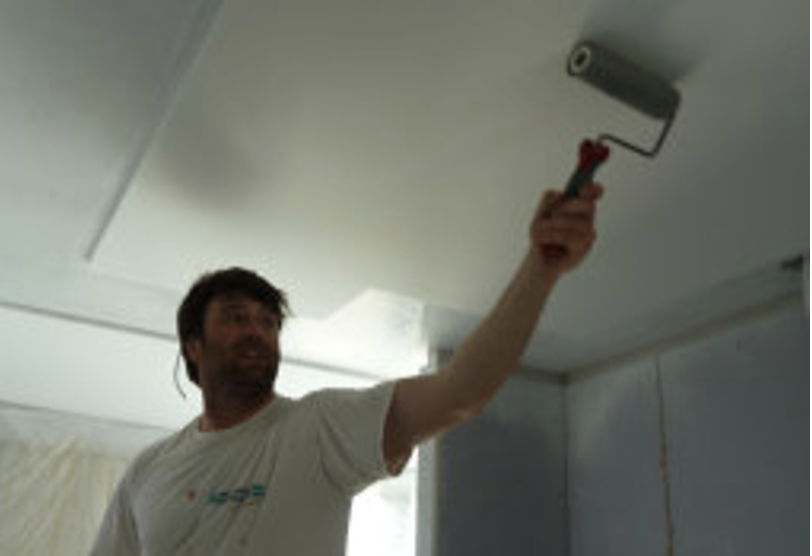
Use a long pile roller to apply 600-800g of “DEKOZELL Highly Waterproof Dispersion Adhesive” per square meter. This is so much adhesive that it drips from the ceiling! Apply plenty of adhesive to the edges with a radiator brush or a trimming roller!
The Flexopanel are highly absorbent, which is why this thick bed of adhesive is absolutely necessary. A thick bed of adhesive also makes it easier to adjust the position of the Flexopanel.
The first half bucket of adhesive is almost enough to fill the roller and glue the first one or two Flexopanel. Therefore, do NOT try to determine the material consumption of the adhesive with the first canister. It is better to apply too much adhesive than too little! Using too little adhesive is one of the most important sources of error!
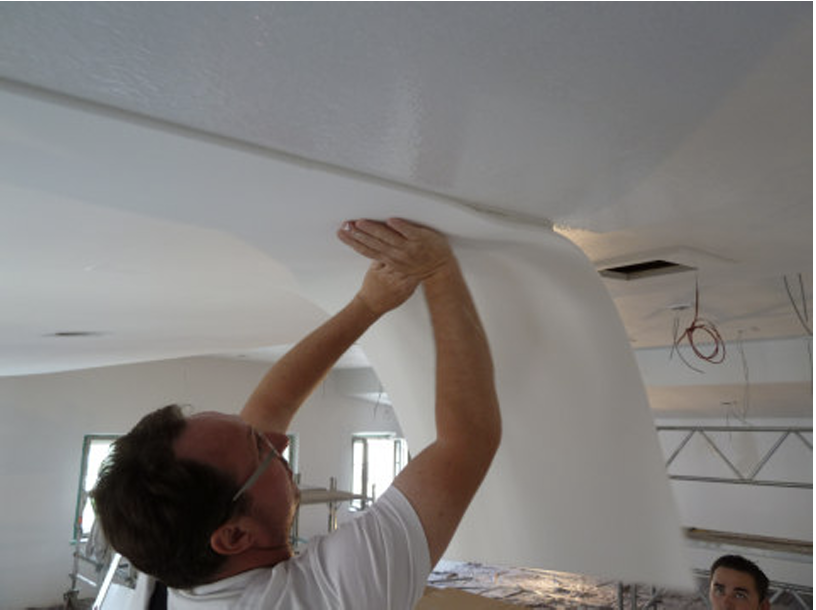
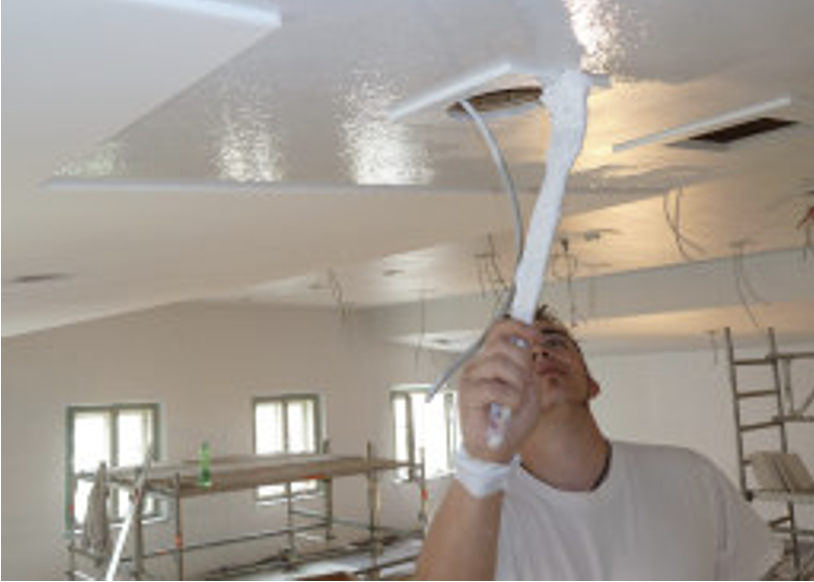
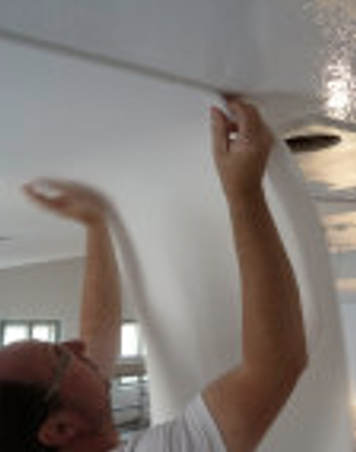
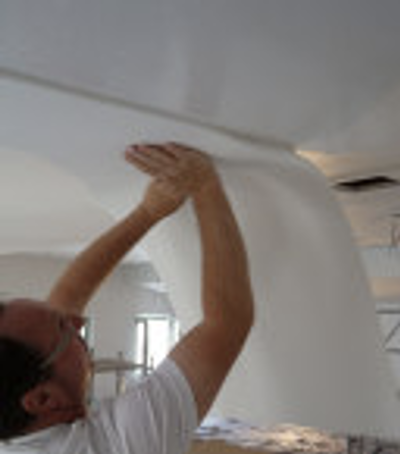
The adhesive has an open time of approx. 15 minutes. Place the Flexopanel in the adhesive bed, always offset the edges by at least 20-30 cm from the previous sheet. Due to the absorbency of the panel, it will almost pull itself into the honey-like adhesive bed.
Lay the panels WITHOUT SCORING, always allow them to butt up against each other – but lay without tension or pressure (i.e. do not stretch or compress)!
Use a wallpapering roller to press the DEKOZELL Flexopanel onto the substrate and into the adhesive bed.
First remove any excess adhesive from areas that cannot be immediately covered with a Flexopanel due to the work process. Dried adhesive will later lead to uneven areas that cannot be leveled out!
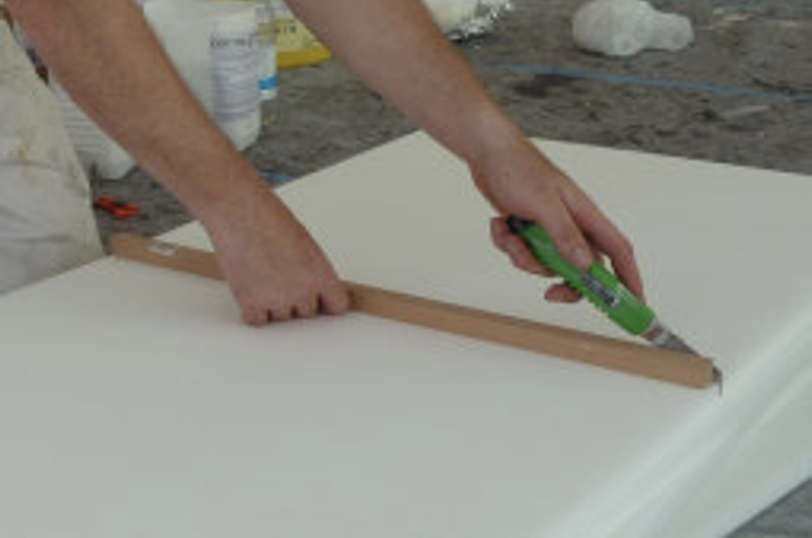
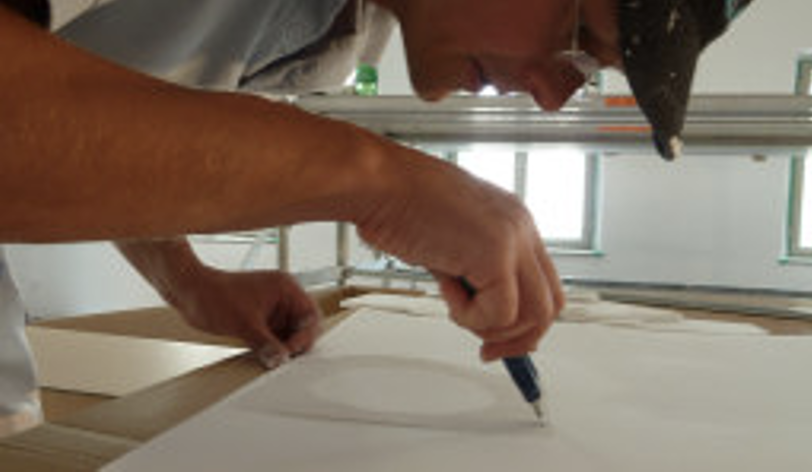
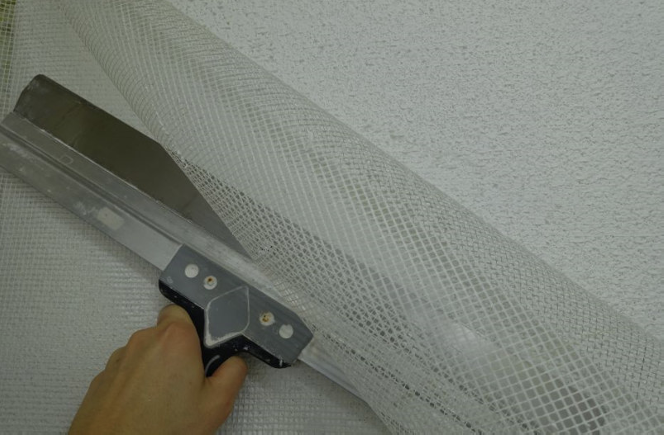
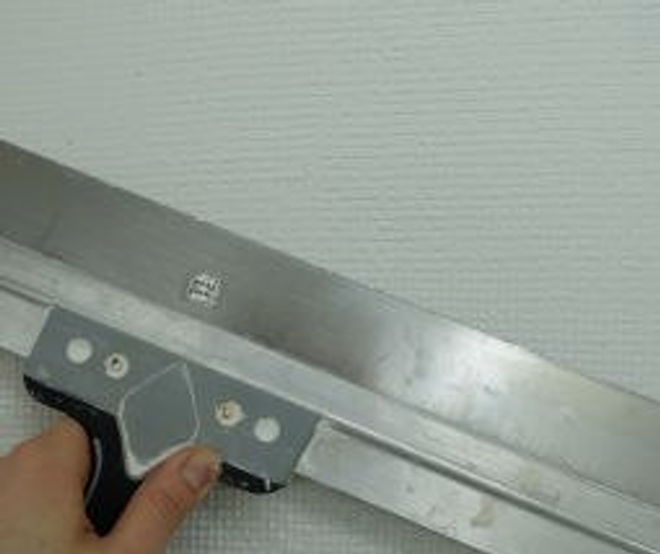
Mark the cut with a pencil on a work table or the transport box of the panels and cut with the cutter and stop.
When cutting, hold the cutter knife at a right angle to the cut edge to avoid cracks caused by crooked cut edges when laying the Flexopanels later.

As the Flexopanel are soft and not dimensionally stable, it is possible, especially on large areas, that the sheet may become curved over time, making it difficult to lay the next sheet without bumping. In this case, simply use a long straightedge with a cutter knife to straighten the edge. The cut edge can also be pre-marked with adhesive tape if a long straightedge is not available.
Areas that should later have a solid base instead of the soft Flexopanel (e.g. installation spots, mounting points for projectors, fixed edges as edge finishes) were covered with elements made of 9.5 mm thick plasterboard as part of the preparatory filling and priming work.
As soon as you come into contact with such a 9.5 mm plasterboard tile when laying the Flexopanels, the easiest way is to coat it with DEKOZELL Isogrund, place the Flexopanel to be laid and take an impression of the “tile” through the wet plaster base.
The impression can then be cut out with the cutter knife.
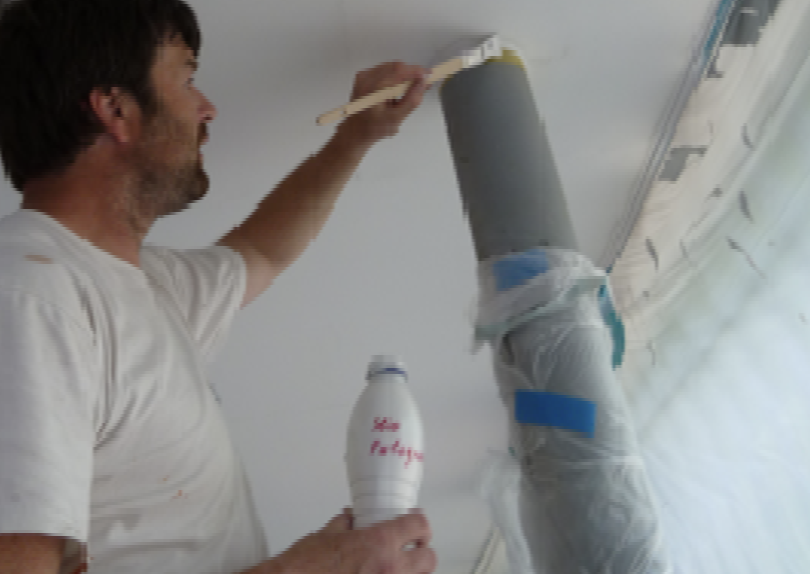
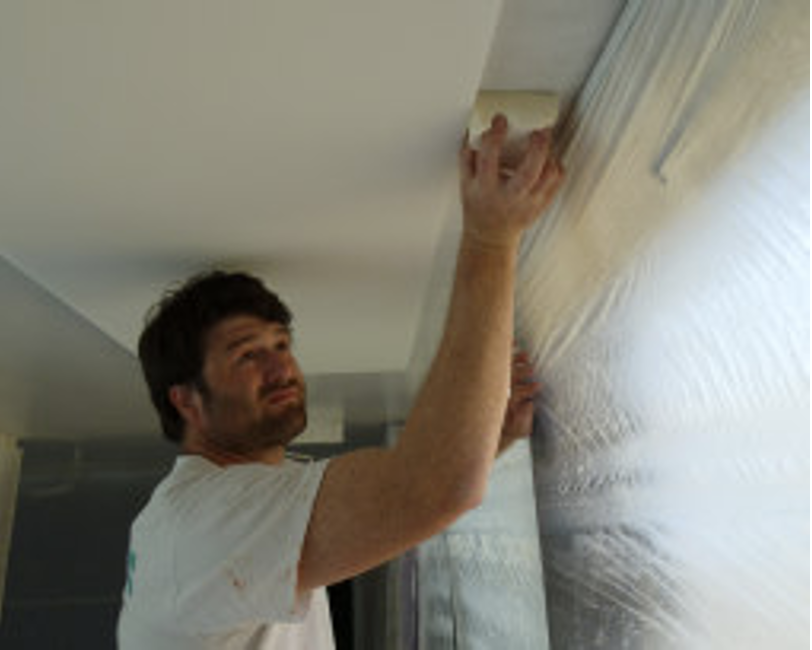
After laying, coat all edge areas of the Flexopanel towards the wall or within the area around columns or the 9.5 mm GK tiles again with approx. 2-3 cm of dispersion adhesive.
The Flexopanel will become so saturated with adhesive in these areas that it will be completely rigid and no longer soft after drying. As a result, it no longer “works” under the fabric later on, which prevents unsightly edge tears. All coated areas are acoustically lost.

After installation, the dispersion adhesive must dry out completely before proceeding with the final acoustic plaster coating.
Thermal bridges hinder drying and cause the Flexopanels to peel off during the drying phase. At 22°C air and substrate temperature and max. 65% humidity, 12 hours are usually sufficient for the adhesive to dry.
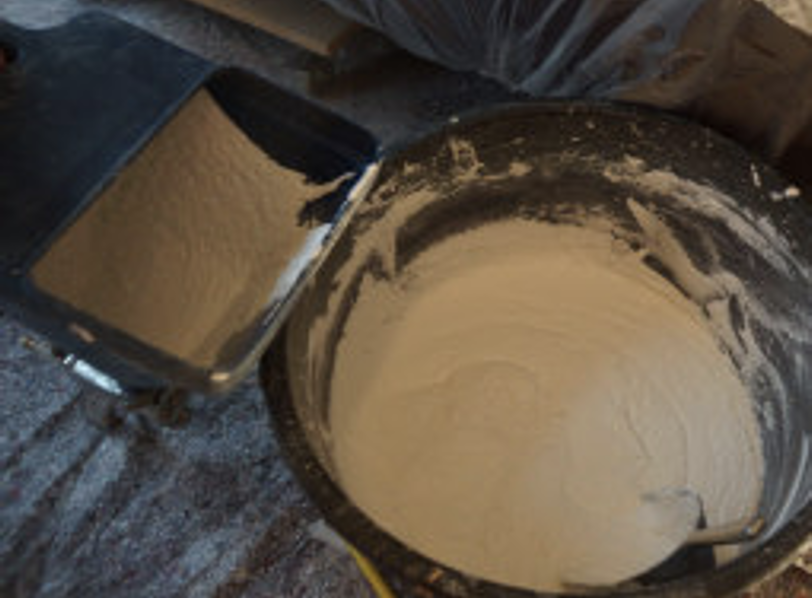
Mix the DEKOZELL Acoustic Spray Filler with 1l DEKOZELL Acoustic Dispersion Binder and 15l water. Use the DEKOZELL mixing set for this! Stirring rod 160mm basket diameter, 3min stirring time.
Fit STORCH plastering gun with conical 4mm nozzle made of 4-hole disk and pre-rinse with water before filling. After filling with acoustic spray filler, press the gun firmly onto the floor with the gun handle. Instead of the conical 4 mm nozzle, the faster conical 7 mm nozzle can also be used. Due to the high air volume required when spraying with the air pockets in the spray filler can hardly be avoided. These become visible as pores when sanding.
Note: The O-ring of the STORCH plaster gun quickly ends up in the spout when washing out. For textured final surfaces with acoustic plaster, the DEKOZELL gun no. N429A is required for spraying. The STORCH gun is only for the smooth acoustic spray filler.
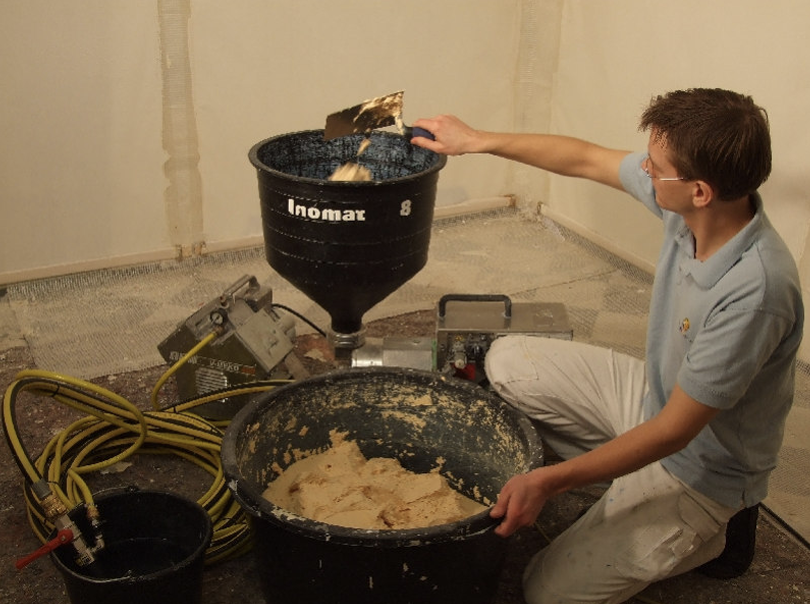
It is better to use the Inomat M8 spraying machine than the plaster gun. Working with the machine is easier than with the gun, as you can spray from the floor up to a ceiling height of 3.5 m in a relaxed manner. Material and air can also be regulated separately–spraying with as little air as possible.
Tip: Place the telescopic pipe in a small leather roofing belt pouch when spraying–just like a flag bearer does.
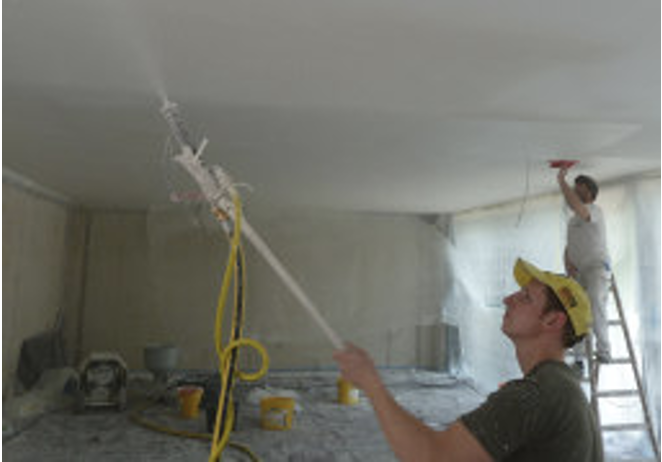
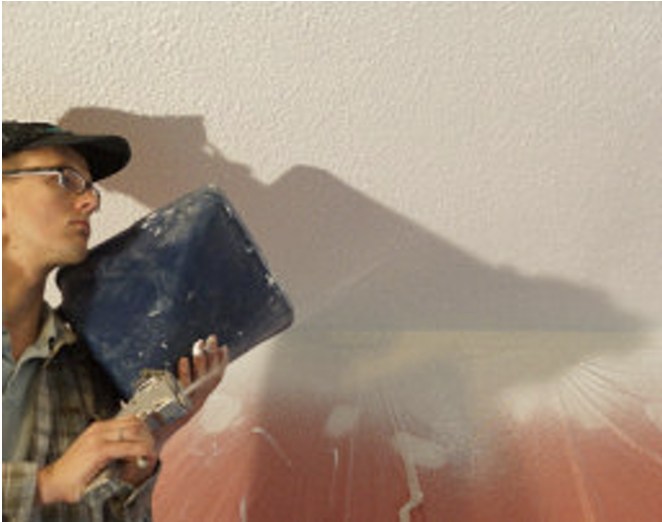
The first layer of DEKOZELL Acoustic Spray Filler is sprayed on with the finest possible spray pattern, not covering the surface and with very economical consumption. Hold the nozzle at a distance of approx. 10-15 cm from the ceiling. The spray pipe or plastering gun is guided calmly and relaxed over the surface in overlapping circular movements. A relatively economical consumption of one bag of DEKOZELL acoustic spray filler for approx. 20-30m² of Flexopanel surface results in the correct layer thickness for this first spray pass.
The DEKOZELL glass fibre reinforcement mesh 75g/m² mesh size 5x5mm is then applied to this first thin, non-covering layer and pressed on with the façade filler. Allow the individual lengths of fabric to overlap by 5-10cm. The façade filler is very easy to apply to the mesh. With the right amount of filler, a lot of the Flexopanel remains visible everywhere.
The fabric usually dries overnight due to the minimal use of DEKOZELL filler. The first thick top coat is then applied to the dry fabric. Set the spray pattern as coarse as possible and spray with as little air as possible. Spread one bag of filler over 810m² and smooth with the DEKOZELL tools.
Textured final surface:
If the textured final surface is to be created with the DEKOZELL Acoustic Plaster, after tacking down the fabric, add more filler and change the surface the material in the spraying machine to the DEKOZELL Acoustic Plaster. The textured surface is very easy to produce – if you have the right spraying tool and experience in creating even sprayed surfaces.
For textured surfaces, we recommend commissioning specialist companies trained by us.
The great advantage of textured surfaces is that they can be produced more quickly. The DEKOZELL acoustic plaster can be applied directly to the wet layer of reinforcing mesh.
Smooth final surface:
For inexperienced installers, the smooth final surface is the safer alternative. However, the mesh layer must first be dried before applying further spraying and smoothing coats. We recommend the use of fans to speed up the drying process.
A second, much thicker layer of DEKOZELL Acoustic Spray Filler is now applied to the dried layer of reinforcing mesh.
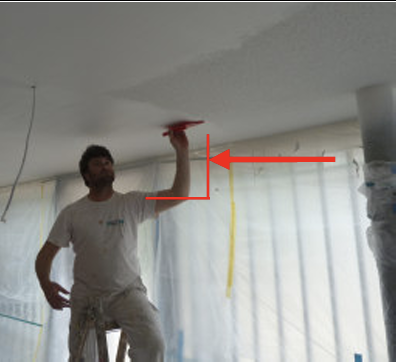
Rise to working height with the filled gun and apply the acoustic spray filler evenly in circular movements with the finest possible spray pattern. The handle of the STORCH plaster gun can be placed on the shoulder to relieve the strain.
Spray extra thick in the corners and on the edges, as filler will be pulled out from there again when smoothing.
When spraying with a gun, a small rolling scaffold or at least a plank is recommended. When working on larger areas in pairs, the machine is much easier to use. Here too, however, the material consumption must be strictly based on the area: apply one bag to a maximum of 5m²–otherwise the layer thickness will be too thin afterwards when sanding.

The more evenly the material is sprayed on, the easier it is to smooth and the lower the risk of sanding through later during the sanding process. It is highly recommended to apply the filler to the dried reinforcing mesh in two layers with intermediate drying – instead of just one thick layer. For two layers with intermediate drying, apply one bag of DEKOZELL to 10-12m² for each layer.
Due to the long open time of DEKOZELL® acoustic spray filler, an unusually long time is available for smoothing. The spray filler remains soft and smooth throughout the entire working day! This means that a single person can do an entire ceiling on their own (without expensive surface scaffolding!). However, it is still easier if you don’t wait too long before smoothing. When applying with a gun, you can first level the spray filler with the smoothing blade, then switch to the Pajarito plastic filler item no. 958. When spraying with the machine, with a little practice the material will lie so evenly from the outset that you can use the red plastic trowel straight away.
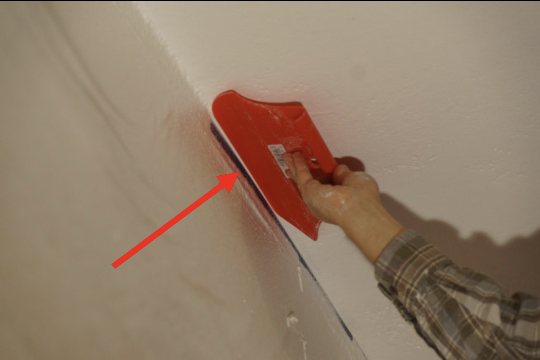
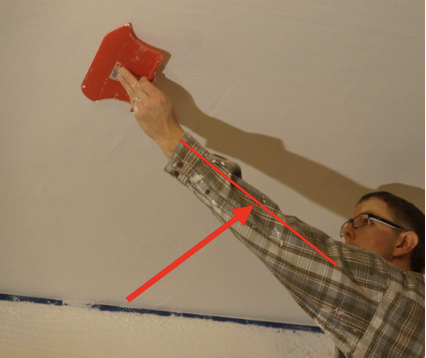
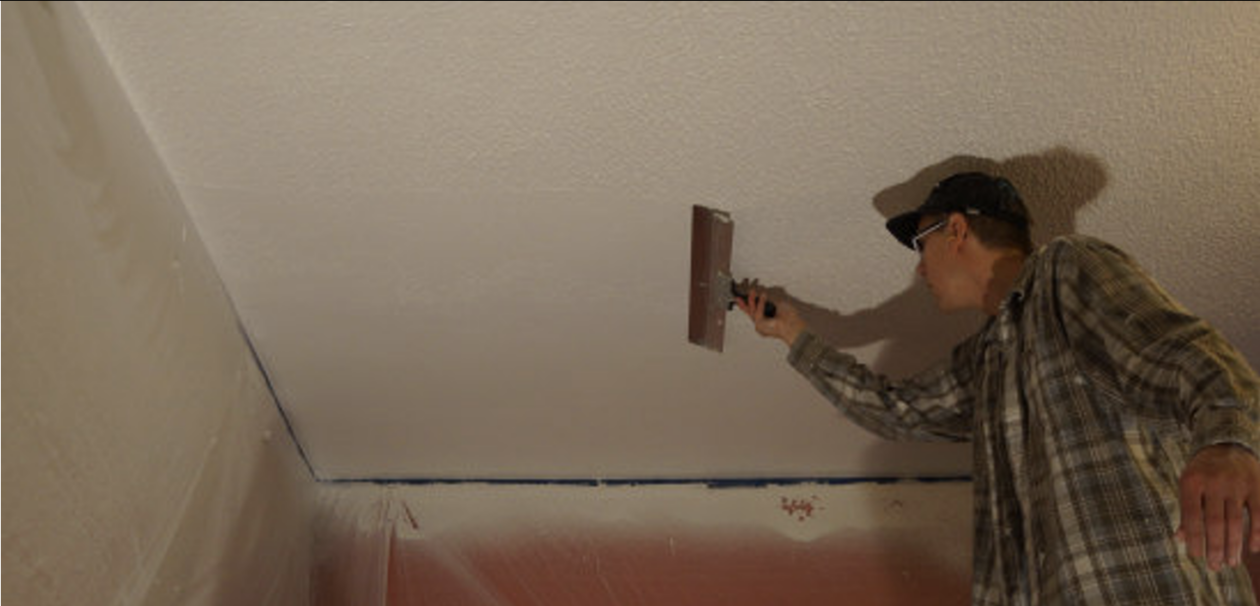
Place the red plastic trowel on the blue adhesive tape at the edges first and pull the filler up onto the ceiling from there. First smooth the edges, then the surface. During drying, the spray filler shrinks by approx. 50% – slight trowel strokes from the application of the smoothing tool are therefore evened out considerably during drying. Pull the red plastic trowel completely flat and without pressure over the surface – without circular movements and without holding the trowel steeper at the end of the stretch: Always start flat with the arm extended, pull the arm straight through to the body at this angle without applying pressure until the lower arm is vertical – and then simply remove the trowel from the ceiling at exactly this angle without bending the tool again! When “edging”, you would only push the soft spray filler away, just as with the usual circular movements of the arm when filling. After initial skepticism, many craftsmen describe smoothing with the acoustic spray filler as “totally different, but much easier”.
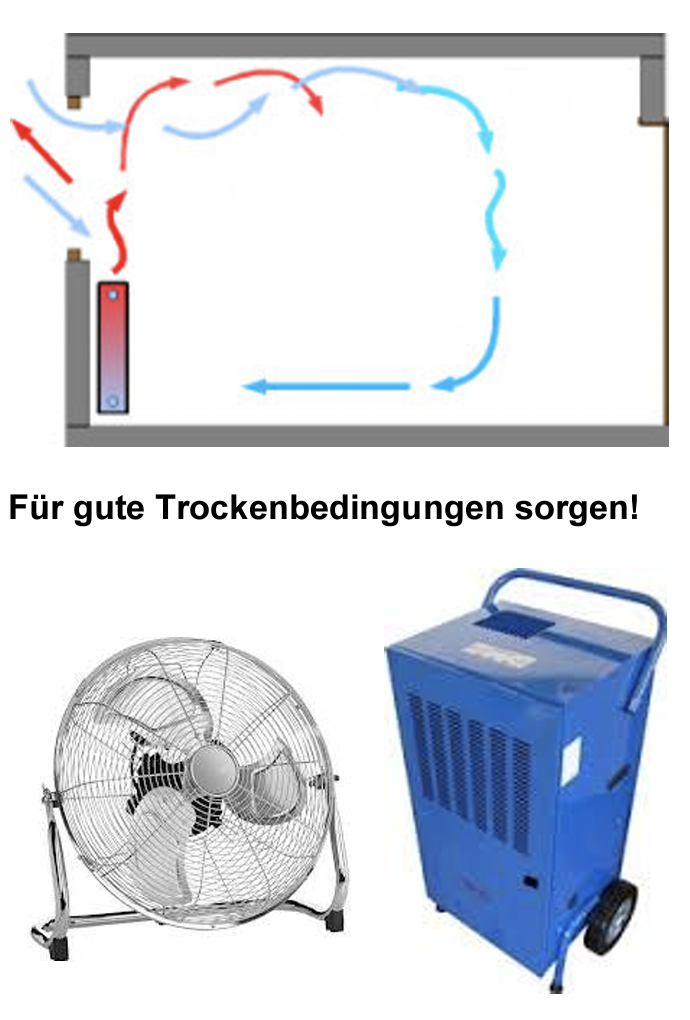
Clean up the construction site after smoothing. There are now almost 4 liters of water per square meter of acoustic surface in the room! To evaporate water, heat is required, at least 20°C – preferably 22°C or even more. We generally advise against the use of fans. Shock ventilation is not enough, ventilation must be continuous! The use of condensation dehumidifiers in conjunction with fans is better than fans + ventilation. The dehumidifiers must have sufficient capacity! We recommend a theoretical dryer capacity of 3 liters per square meter of acoustic surface (e.g. a 120 liter dryer for 40 square meters of acoustic surface).
The acoustic spray filler must dry completely within 34 days!
If this drying time is exceeded, problems such as mildew stains are to be expected.
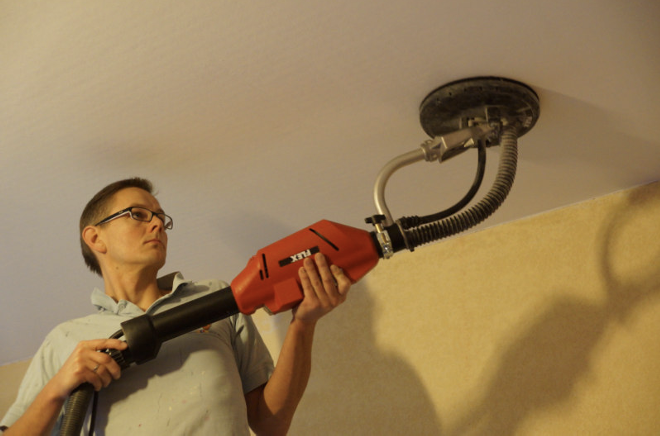
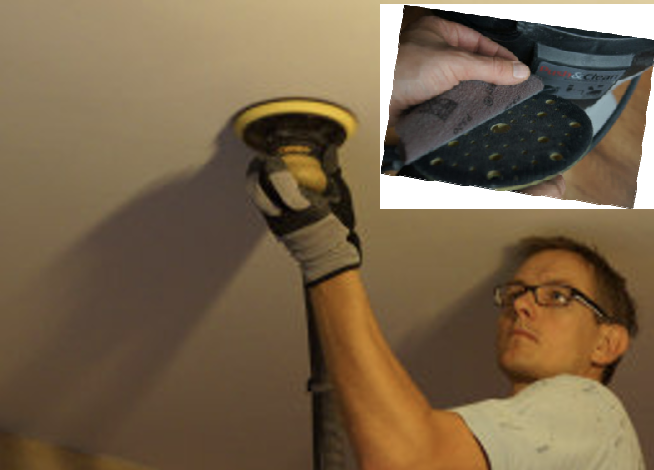
After drying, sanding takes place in two stages: first the basic sanding with the Flex Giraffe, then a short polishing sanding with the Mirka DEROS 650CV eccentric.
The Giraffe can be used with any abrasive grit down to 40 grit. However, polishing with the Mirka eccentric must be completed with 320 grit Abranet.
Sanding is also carried out with the giraffe from a working height so that you can see what you are sanding! With the long-necked giraffe, you can also rest the device on your shoulder.
Insert a bag in the vacuum cleaner – for both the giraffe and the eccentric. The vacuum cleaner’s knock-off device does not work with cellulose dust.
The DEROS 650CV works practically dust-free thanks to the 48 suction holes in the plate. Polishing takes perhaps one minute and is also used later for renovation.
Tips and tricks:
Touch-ups after sanding:
If you accidentally sand down to the fabric in one place or another during sanding, partial touch-ups can also be carried out, at least with the colour white. However, the “patch” must be sprayed on (a spray gun is sufficient) – only then will a “frayed” edge form, which usually makes the repair invisible. If the acoustic spray filler is only applied to the damaged area by hand and not by spraying, the edge of the “patch” usually remains visible.
Masking:
It has proven to be a good idea to apply a fabric adhesive tape (e.g. Tesa 4363, width 35 mm) approx. 15 mm below the ceiling before applying the insulating primer. The blue fabric tape will later form the final edge of the DEKOZELL Acoustic Coating. Position this tape neatly and straight! The cover film for the wall can also be clamped under the blue fabric tape (e.g. cover film purple no. secure).
To ensure that the Isogrund and then the dispersion adhesive do not bond unfavourably with the blue fabric tape, we recommend overlapping this blue tape by a few millimetres with a weaker adhesive crepe tape or yellow grooved PVC tape:
- once with masking tape or yellow grooved PVC tape for the isogrund (remove again immediately after applying the isogrund!)
- After the isogrund, apply a new yellow grooved PVC tape for the adhesive of the flexo panels (remove again immediately after cutting the V-joint in the Ixel!)
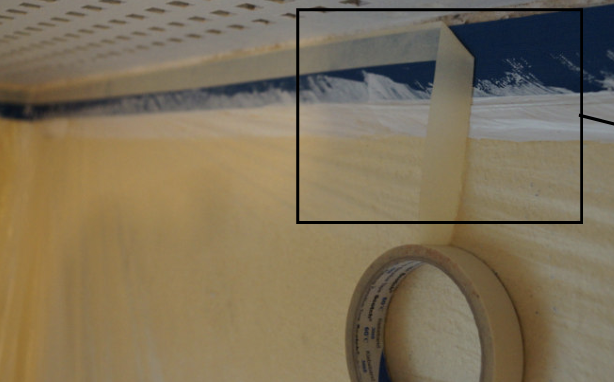
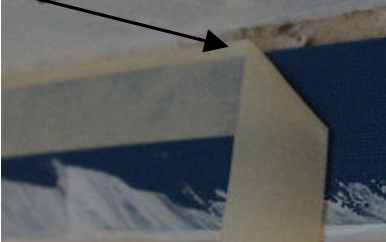
Place the adhesive tapes overlapping to avoid tearing away dried Isogrund or dried adhesive at the very end and damaging the edge of the acoustic coating.
The blue fabric tape is then only removed at the very end after all the work has been completed.
Covering the floor:
Protect the entire surface of the floor with 0.1 mm construction foil and then again with painter’s fleece because of the risk of slipping due to the long open time of the DEKOZELL acoustic coatings!

WHAT YOU REALLY WANT. BETTER THAN EVER.
We give everything for your smooth result.
Seamless acoustic plaster systems are still a niche product. But one that we live and love. We have specialized in it, are really good at it and do it with enthusiasm. And we offer you and your team the expertise, performance and flexibility you need to get the job done. For both small and large projects.


Let us convince you
and inspire you.

Let us advise you
Talk to our Dekozell specialists. We “only” make seamless acoustic plaster systems, but we do it uniquely well and with enthusiasm. And we go the extra mile for you to find the best solution for your project.
Request a free sample
Only your professional judgement decides. So request your product sample from us and take the Dekozell quality check into your own hands. We will ensure that you receive your sample as quickly as possible.